Drawing Division Lines
Division Lines allow you to note a single area of overlap between two images that meet the following criteria:
- Images are successive and in sequence by date
- At least one annotation appears in both images
Division Lines are intended to help note areas of overlap in successive images so that overcounting can be minimized. Division Lines are drawn on a task-by-task basis, and drawing Division Lines is only possible after a task has achieved 100% annotation and growth truth review. (Note: Drawing division lines is optional.)
To draw Division Lines, go to the Tasks view and select a task from the table. If the task is ready for Division Lines, the Division Lines button becomes clickable.

Info
not all images are made available for division lines. Division lines only need to be set between successive pairs of images that might have overlapping areas, and both must have annotations to be considered for division lines.*
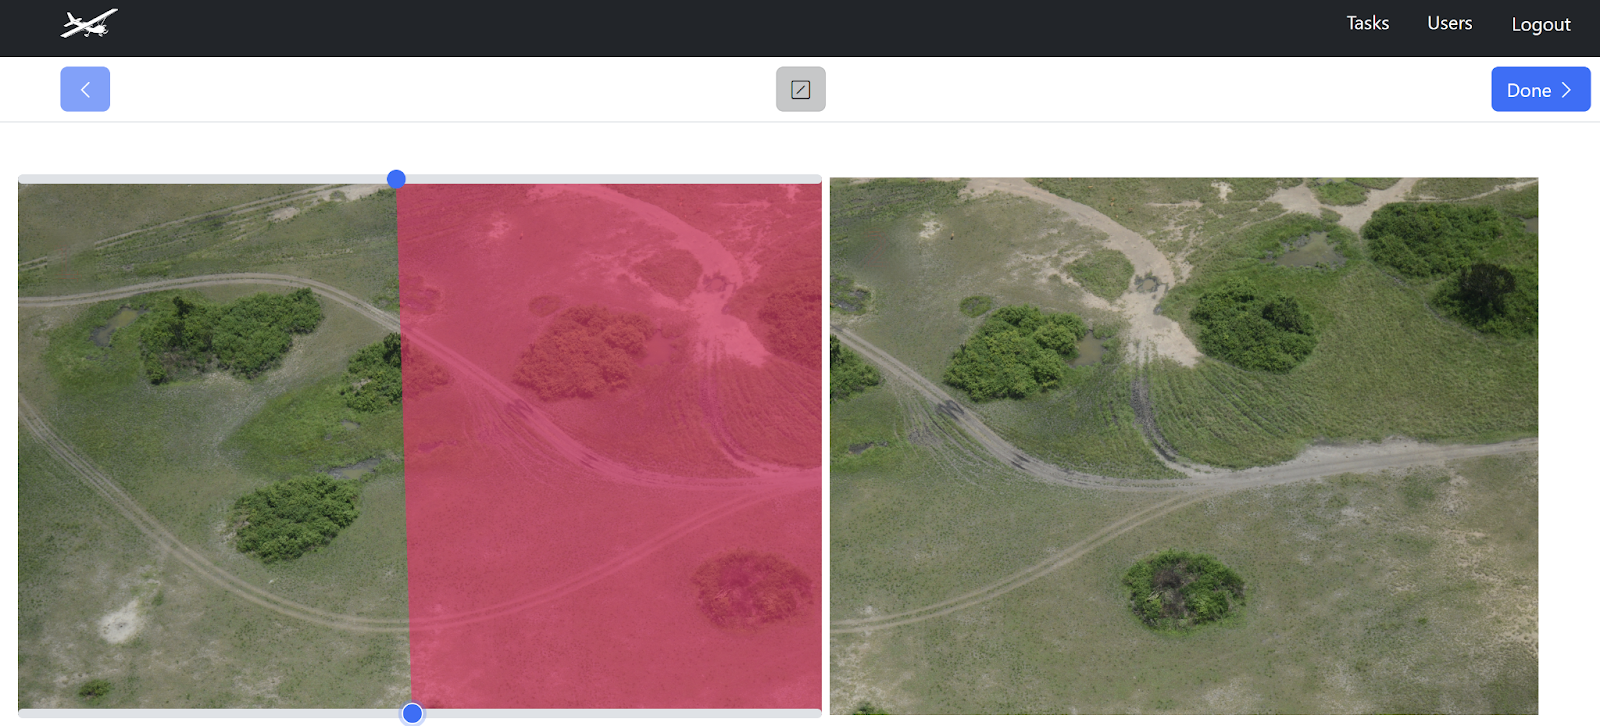
The Division Lines screen provides you with a side-by-side view of two successive images in a sequence. Drawing Division Lines is a stage that requires the side of the plane (Left or Right) to be accurately set on the task to ensure the images are sequenced correctly. The tools available in the Division Lines screen are:
{}
- Done - completes the division line stage of this image pair\, making it as completely and accurately done.
- Sliders - the top and button sliders control the start\, end\, and slope of the line. To the best of your ability\, use the slider to define the overlap area between the left and right images.
Exporting Task Annotation and Image Data for Analysis
Data can be exported for third-party application analysis and modeling by generating image and annotation data as CSV for one or more tasks selected in the Tasks view. Here’s how to export data:
- Click Tasks in the header navigation menu to open the Tasks view.
- In the Tasks view, use the filters to filter the table down to only those tasks that you want to export.
- Click the Export Filtered Results button and then select Export Annotations or Export Images options to choose the content of the
CSVfile to export. - A progress bar indicates the compilation progress of the downloadable
CSVfile. When the progress bar completes, click Download to download theCSVfile.
